Distributor:
The main part (and 1st step) of the setup is configuring Distributor. Either it can be located on the same instance as a publisher (not recommended as it will add some load to your Publisher) or configure as remote distributor.
As always you can do this using GUI or T-SQL.
For purpose of this article I created three named instances, PUBLISHER, DISTRIBUTOR and SUBSCRIBER. Remember that anytime you want to work on Replication you need to connect to full named instance name (in my Case MainTest\Distributor etc.)
First step is enable distributor on the instance that will be running as a Distributor.
Using GUI, go to Replication in SSMS, right click and choose Configure Distribution from there you will be moved to Distribution Wizard.
After first page u need to choose “<server name> will act as its own distributor, SQL Server will create a distribution database and log” It will create default distribution database on that instance and enable also this instance as a Publisher. Later on if u decide to use different distribution db (or create multiple distribution dbs) you can remove that default distribution db.

Then choose path where the snapshot will be located. Check if there is enough space on that drive as some full snapshots of all your published articles can be very big.

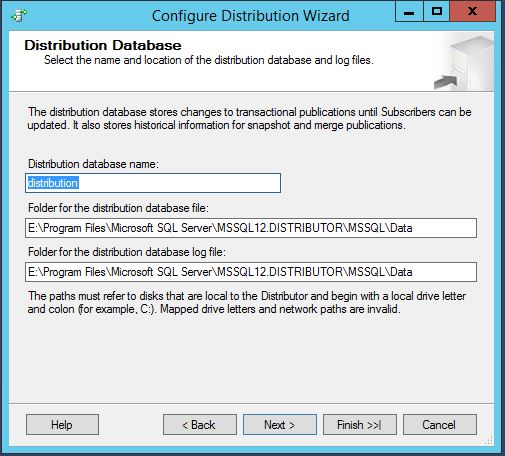
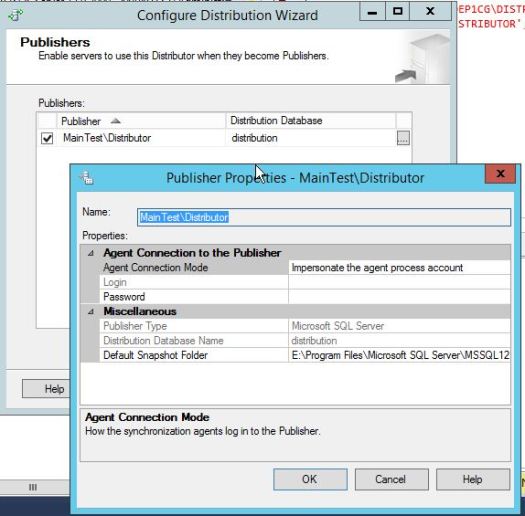
Next you will need to provide a distribution db name and path to the distribution db data file and log file. Same as you creating any new user db. On the next page this distribution db will be automatically Mapped to the publisher instance (which in this case will be your distribution name). You can also choose how Distributor will authenticate with Publisher. In most of the cases you will use Windows auth and the SQL Service account (or dedicated AD account). This will end of the Distributor configuration.
Now when right clicking on Replication tree you will have 3 new options.
When choosing Distributor Properties you can modify :
-distributor setting (like retention period etc.)
-dropping/creating distribution
-mapping publishers to given distribution db
-managing Agent Profile Defaults (here you can change profiles for every agent on distributor)
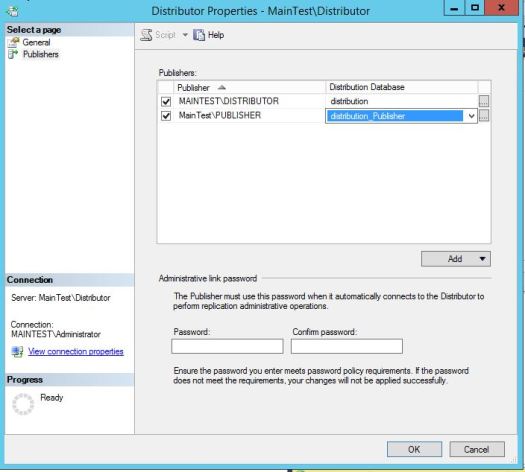
Now we want to configure distributor for our MainTest\Publisher instance. In order to do this first we need to configure new (or use existing one) distribution db under Distributor Properties. We already have one default distribution db on that instance however for purpose of this article we will create new one.
After clicking “New” you can change database name, database paths and retention period.
I strongly suggest if you have enough disk space set this as a fixed range (min and max on same value). Later on it can save you some work. If you leave default setting (0-72 hours) the transactions that been delivered to subscriber will be removed straight away during next distribution cleanup run also it will remove any transactions older than 72 hour (does not matter if delivered or not).
If you set fixed values lets say Min = 48 hour and Max=48 hours. In this case Cleanup will remove only transactions older than 48 hours. It will NEVER remove data that been inserted within last 48 hours. In some cases it can save u lots of work as you can manipulate with LSN of replication transactions in order to set back the replication in time (will write about this bit later). In our case it works as kind of “DR” solution (not often but still).
After creating new distribution db on the left pane go to “Publishers” and add new one, connect to it and map it to correct distribution database. On the same page SQL will ask u to provide a password for user that Publisher will use to connect to Distributor. Save this password as it will be used for EACH Publisher that will use that remote distributor.
Publisher:
Last part of configuration is to go to Publisher and point it to configured distributor by providing a password that will be used to connect to Distributor.
Right click on Replication component and choose configure distribution. You will get same Wizard as before on Distributor however on 2nd page choose second option and point it to your distributor. Next page will ask you for password that you set in previous step.


Once this wizard is completed you good to start creating publications and sending it to subscribers. But this I will cover in next article.
Other way to get this done is by using T-SQL. It is much quicker especially when you need to setup few of these.
How to do it? I will show it in next blog post.

4 Replies to “How to setup Transactional Replication? Part 1”